マックのマウスのコード取替え / Mac mouse cord replacement [身辺雑記]
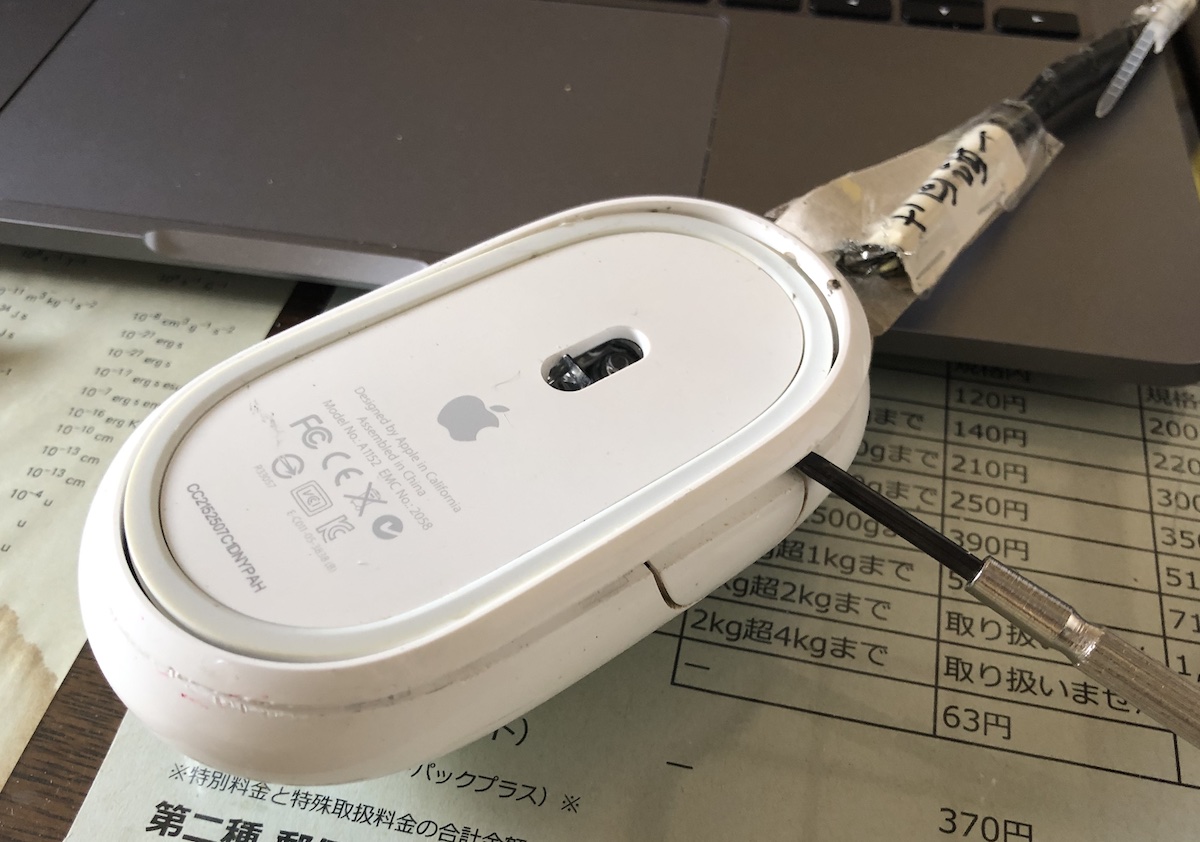
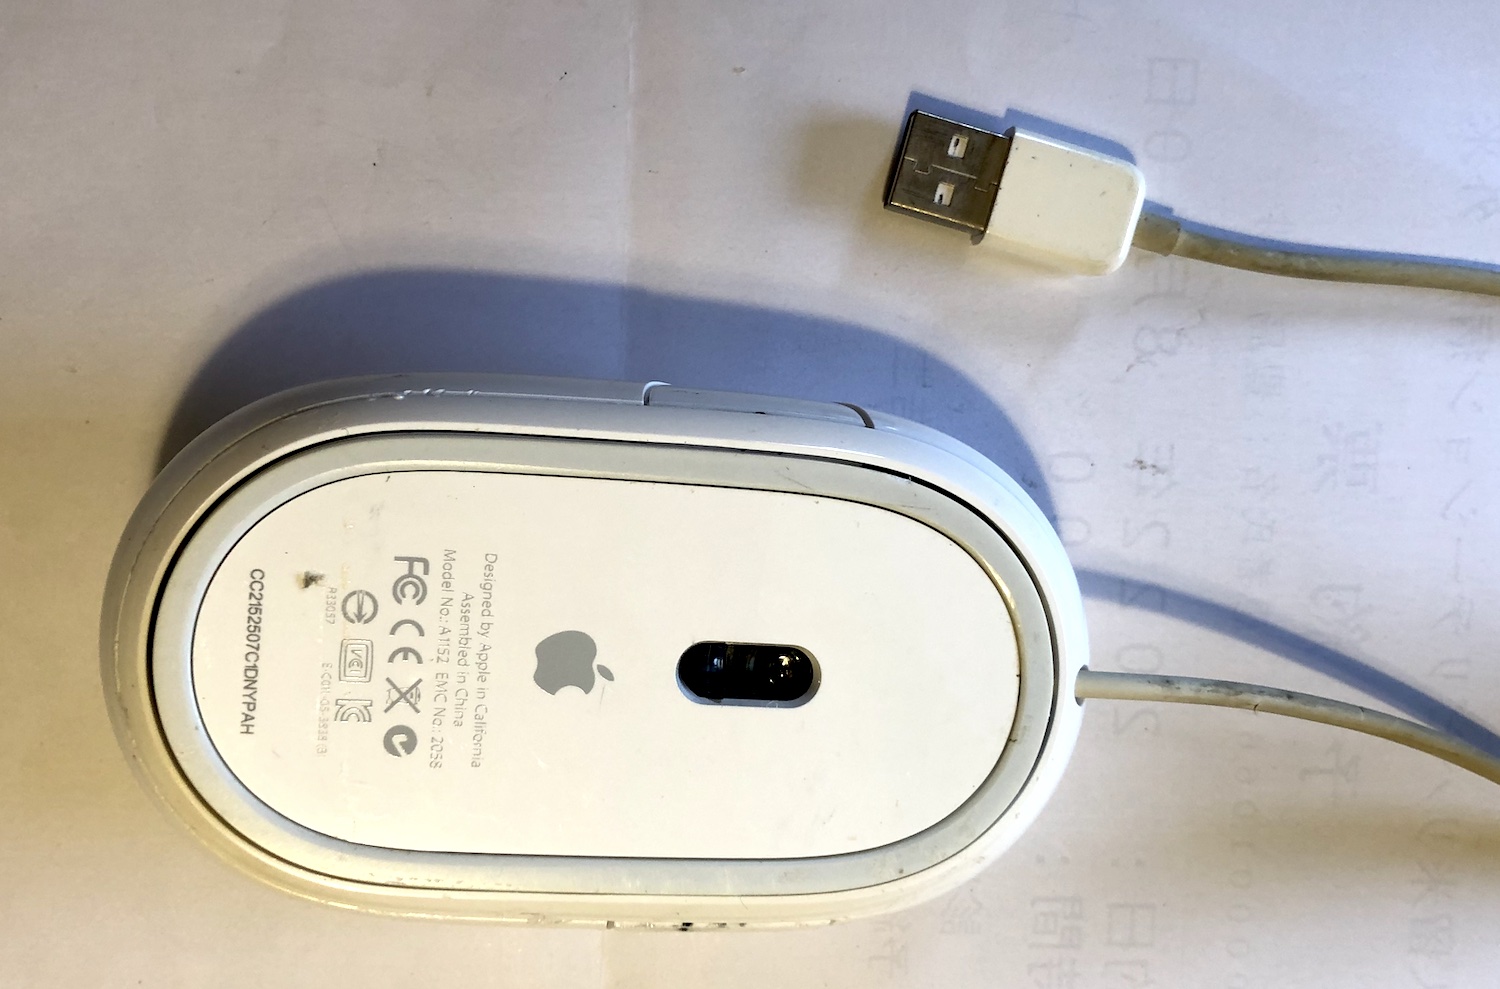
マックの有線のマウスのコードの取り替えをしました。使い古してコードがボロボロになり、何箇所か「添え木」をして使っていましたが、限界。数日前、次のサイトで分解の仕方が分かったので、着手。
http://inufuna.way-nifty.com/rouhi/2007/05/post_ea13.html
無線マウスは便利ですが、電池切れ(充電)の心配が面倒です。それで有線タイプは捨て難い。参考になる人が日本中に1人でもいるどうかわかりませんが・・・。
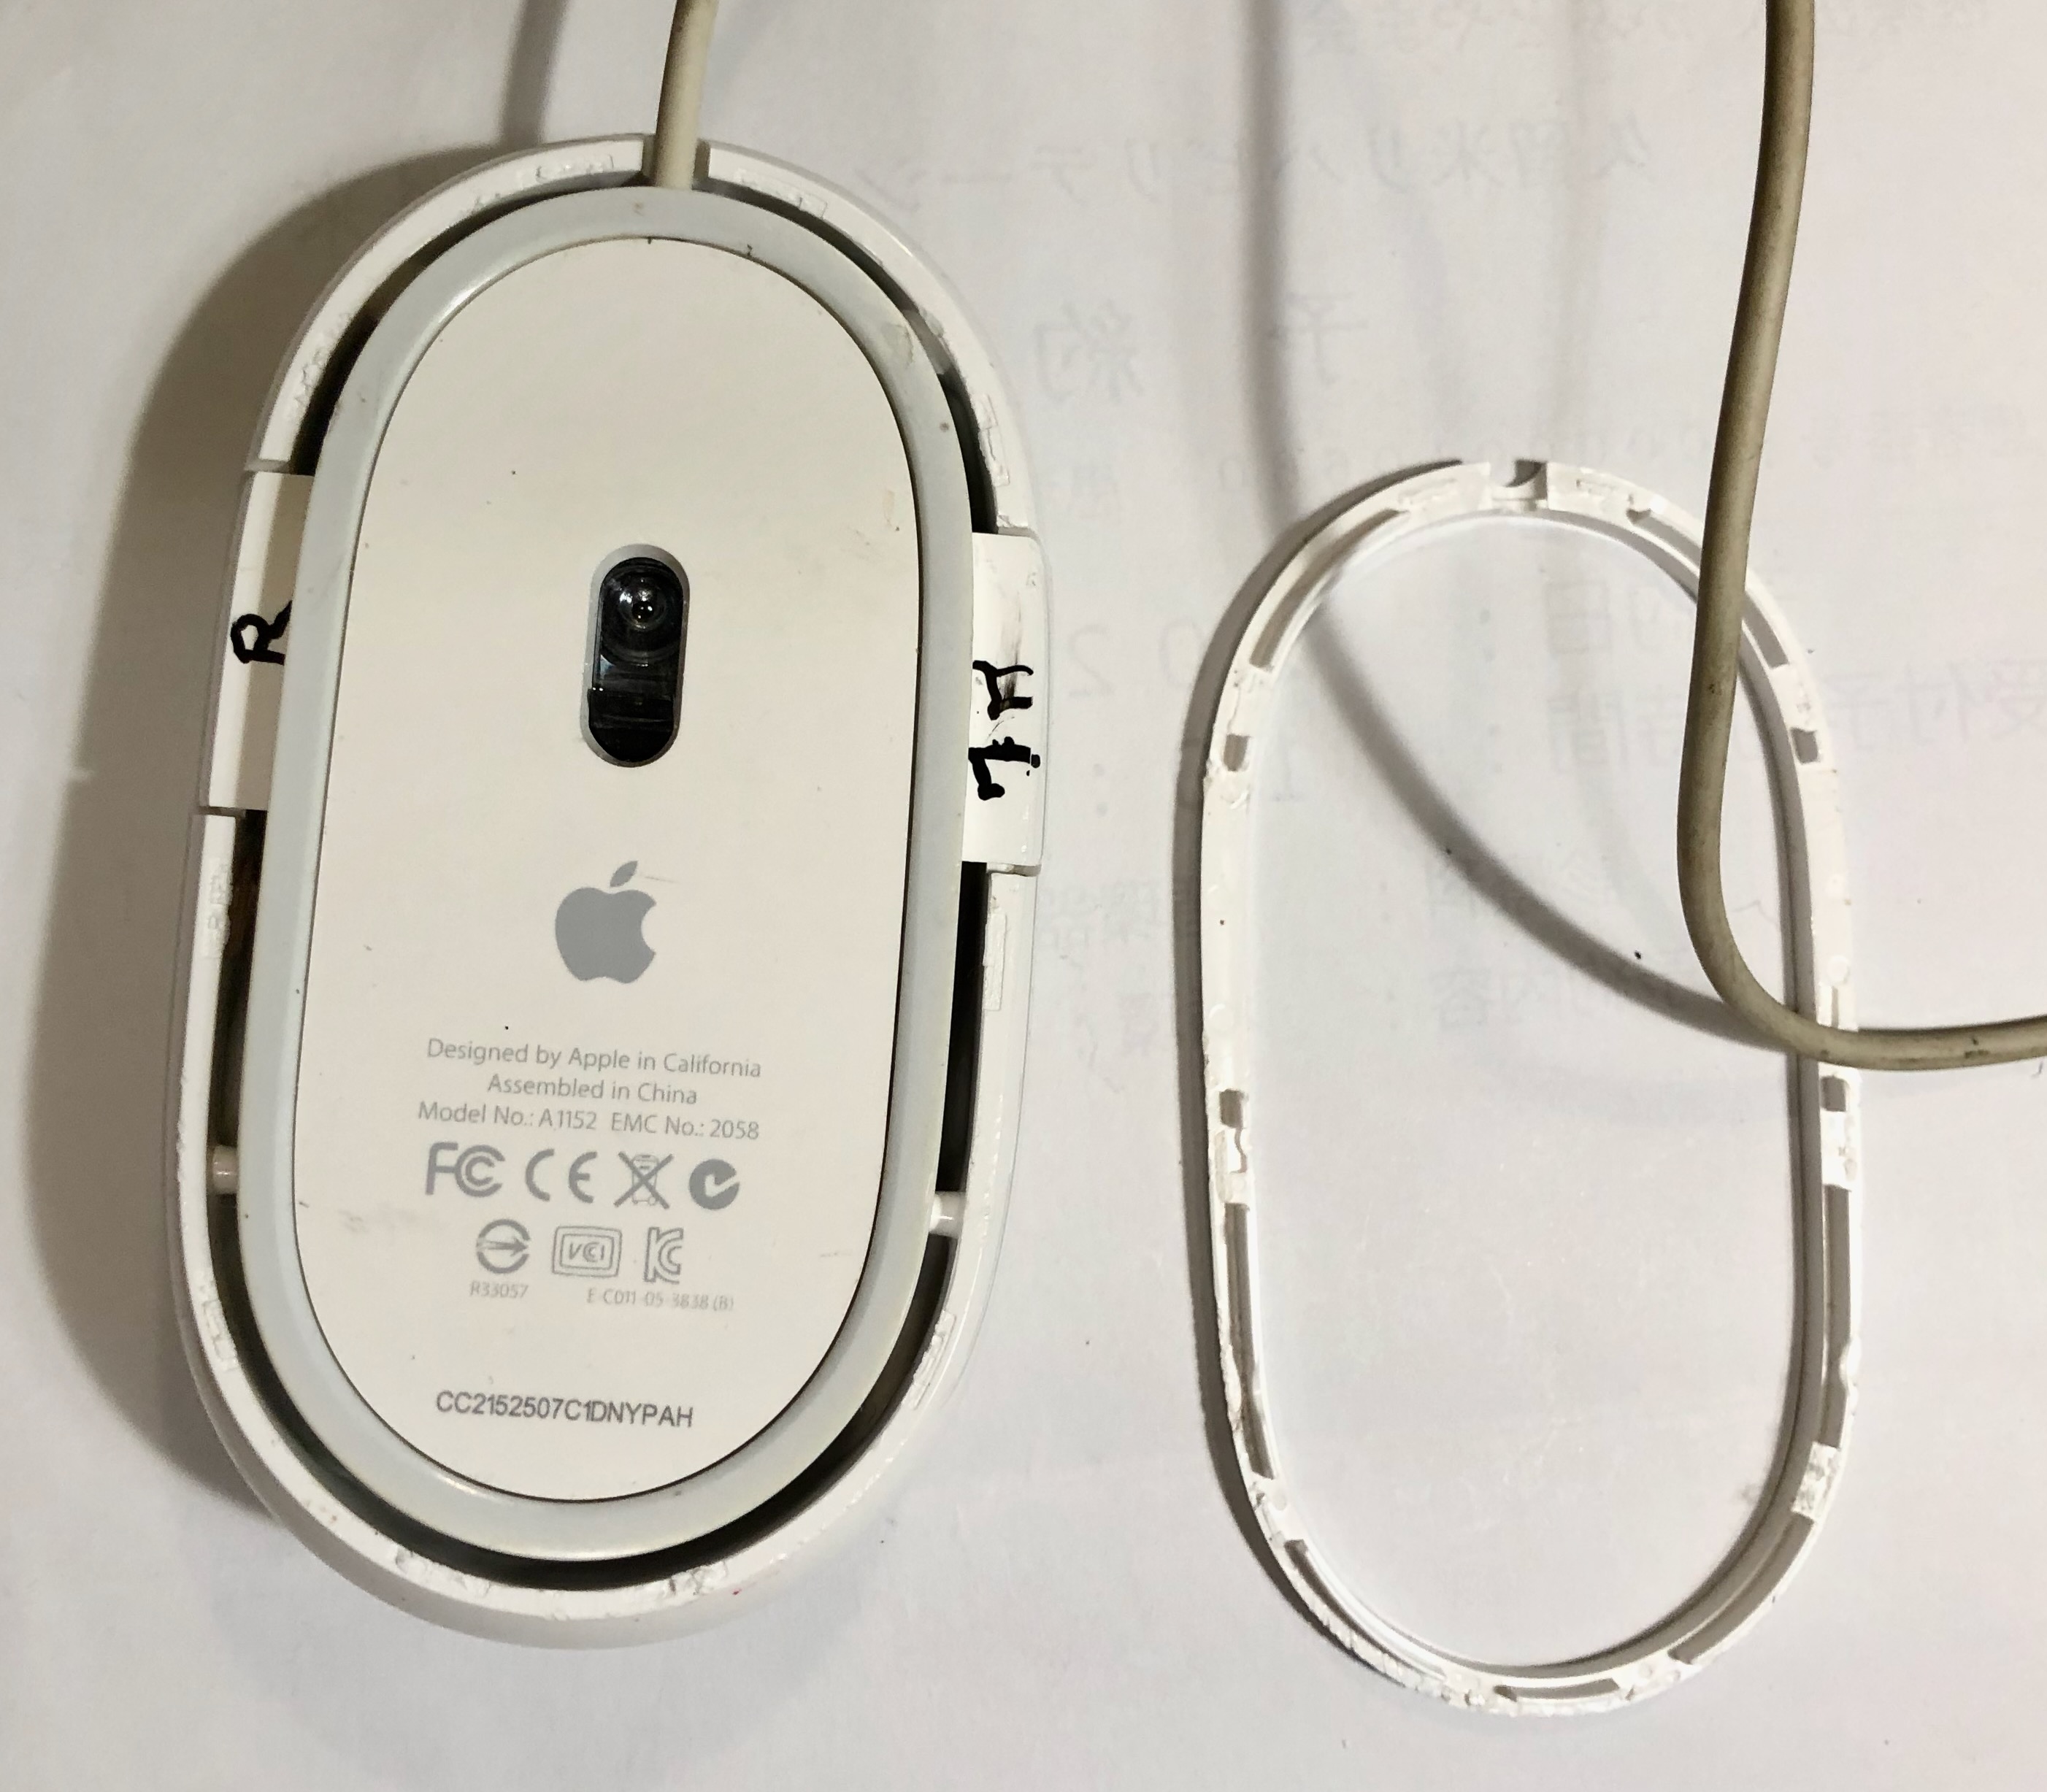
下側の細いリングをこじ開けて剥がす。接着剤でつけてあるので、割らないように。ここが一番の難所。/ Pry open the thin ring on the bottom side and peel it off. It is attached with adhesive, so be careful not to break it. This is the most difficult part.
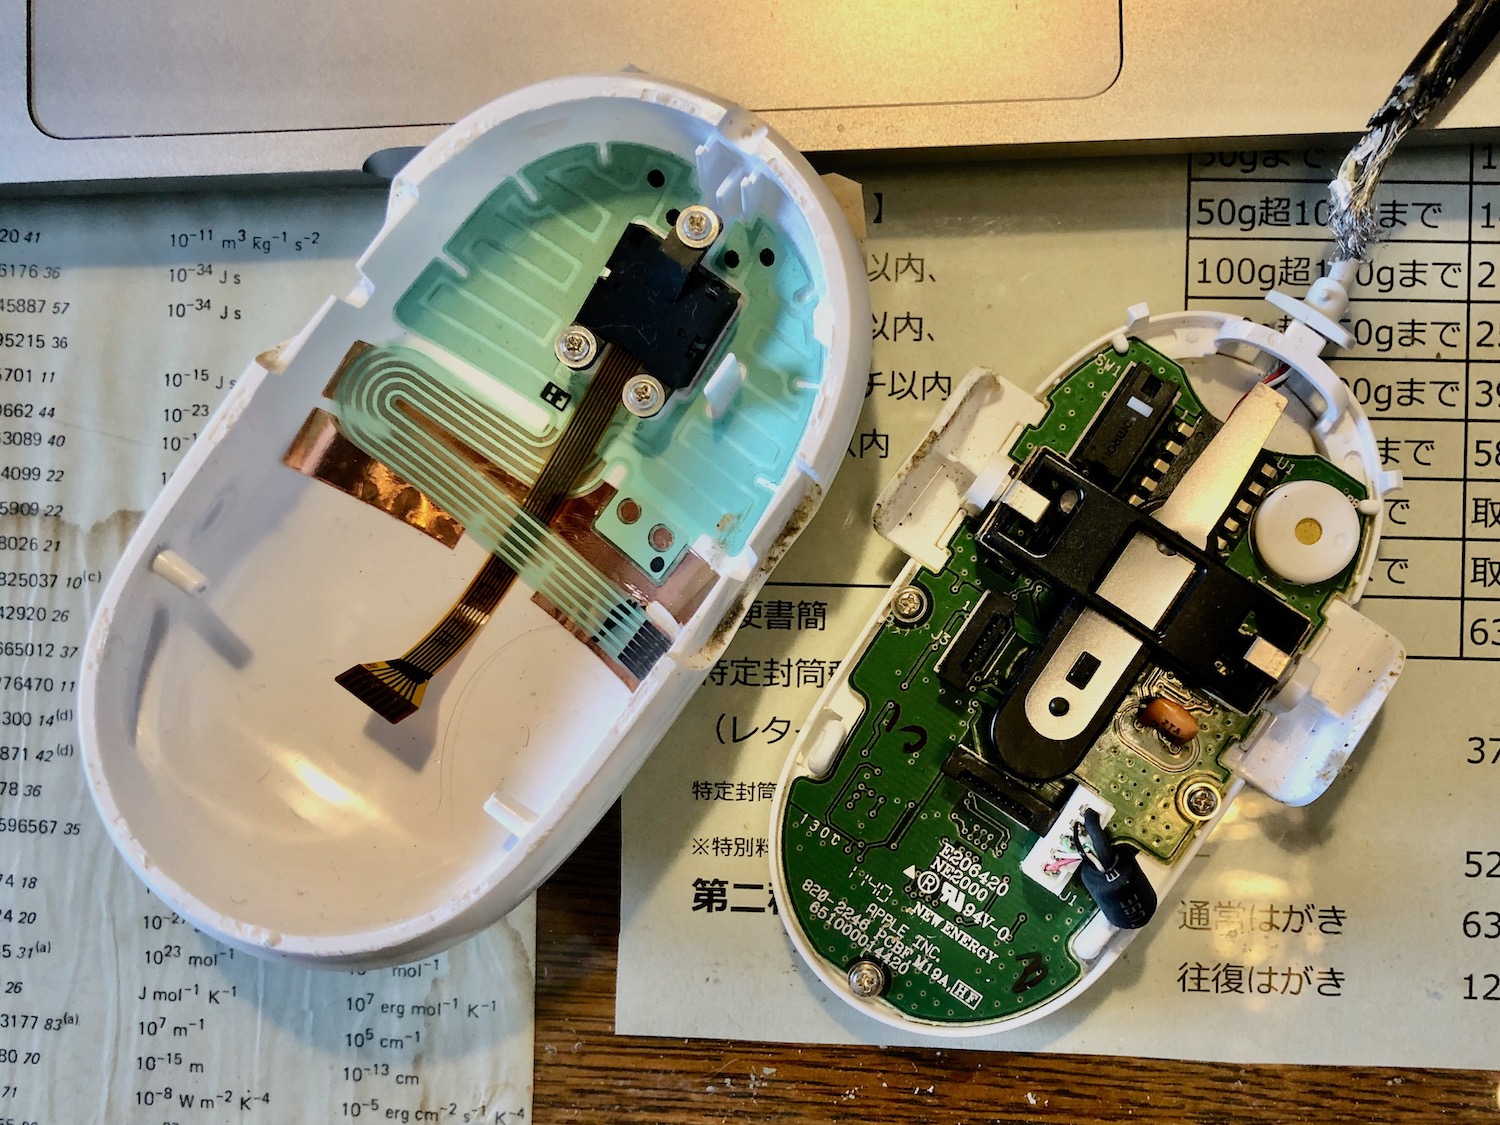
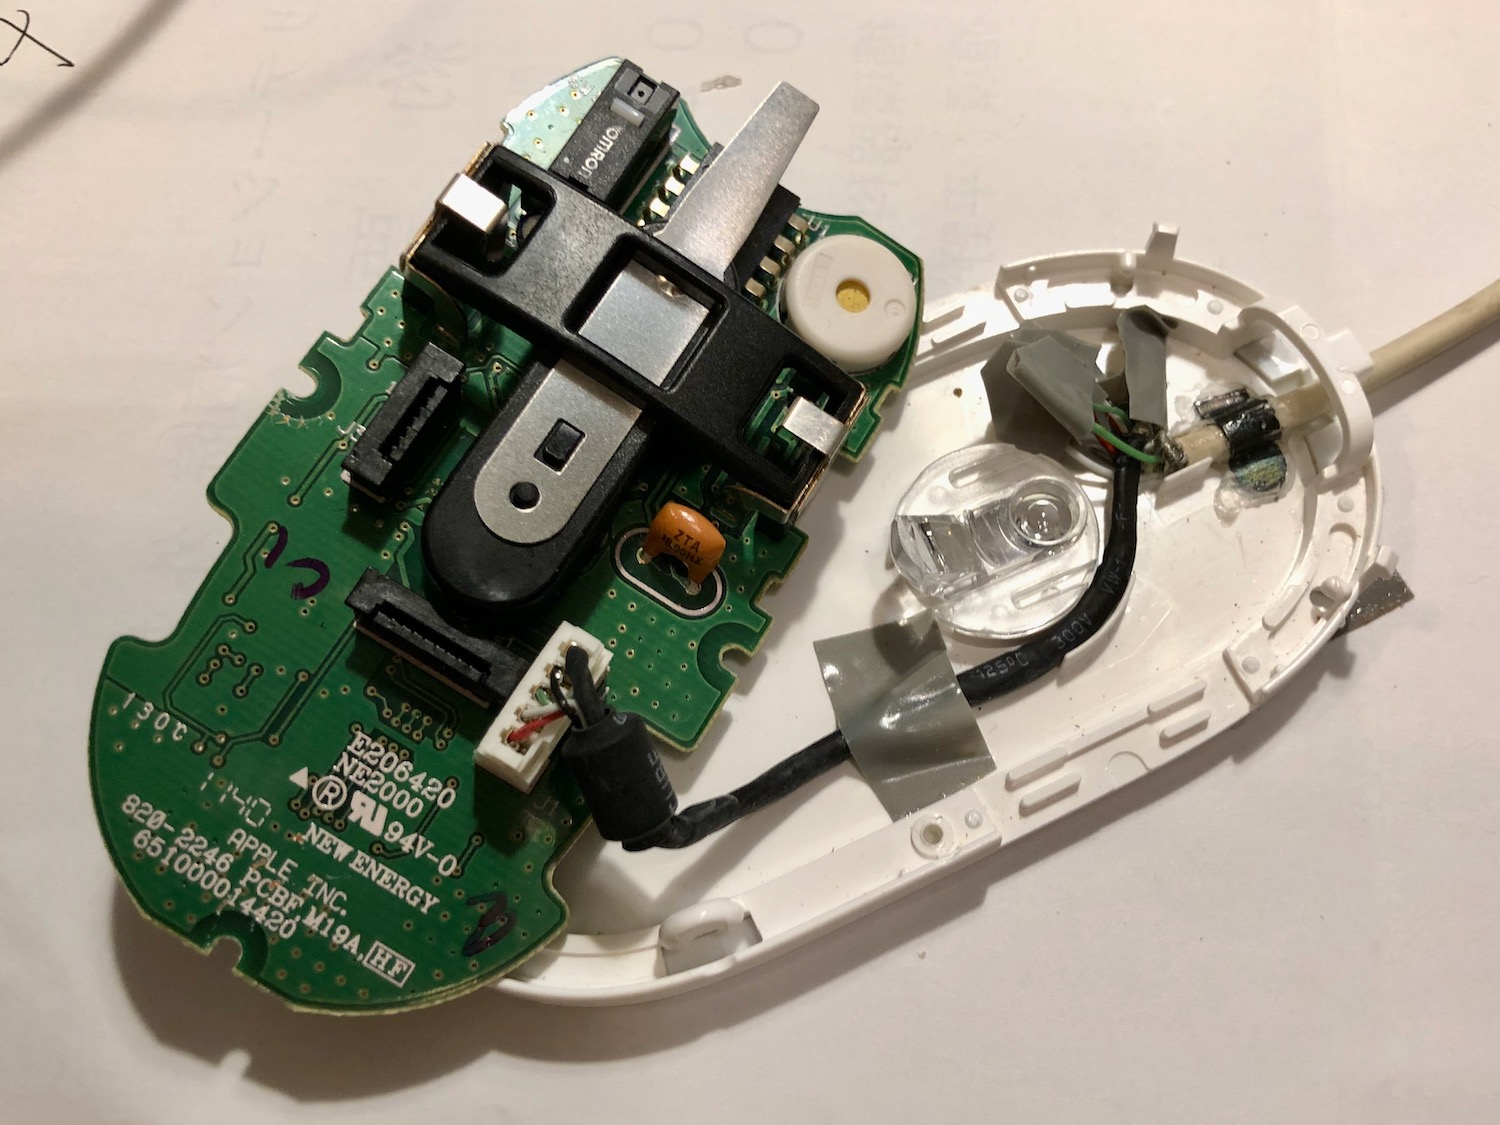
リングを外すと上下に割れます。爪を壊さないように。(2日朝、上の窪みが汚いので画像を「掃除」しました。)/ When the ring is removed, it splits up and down. Do not break the nails.
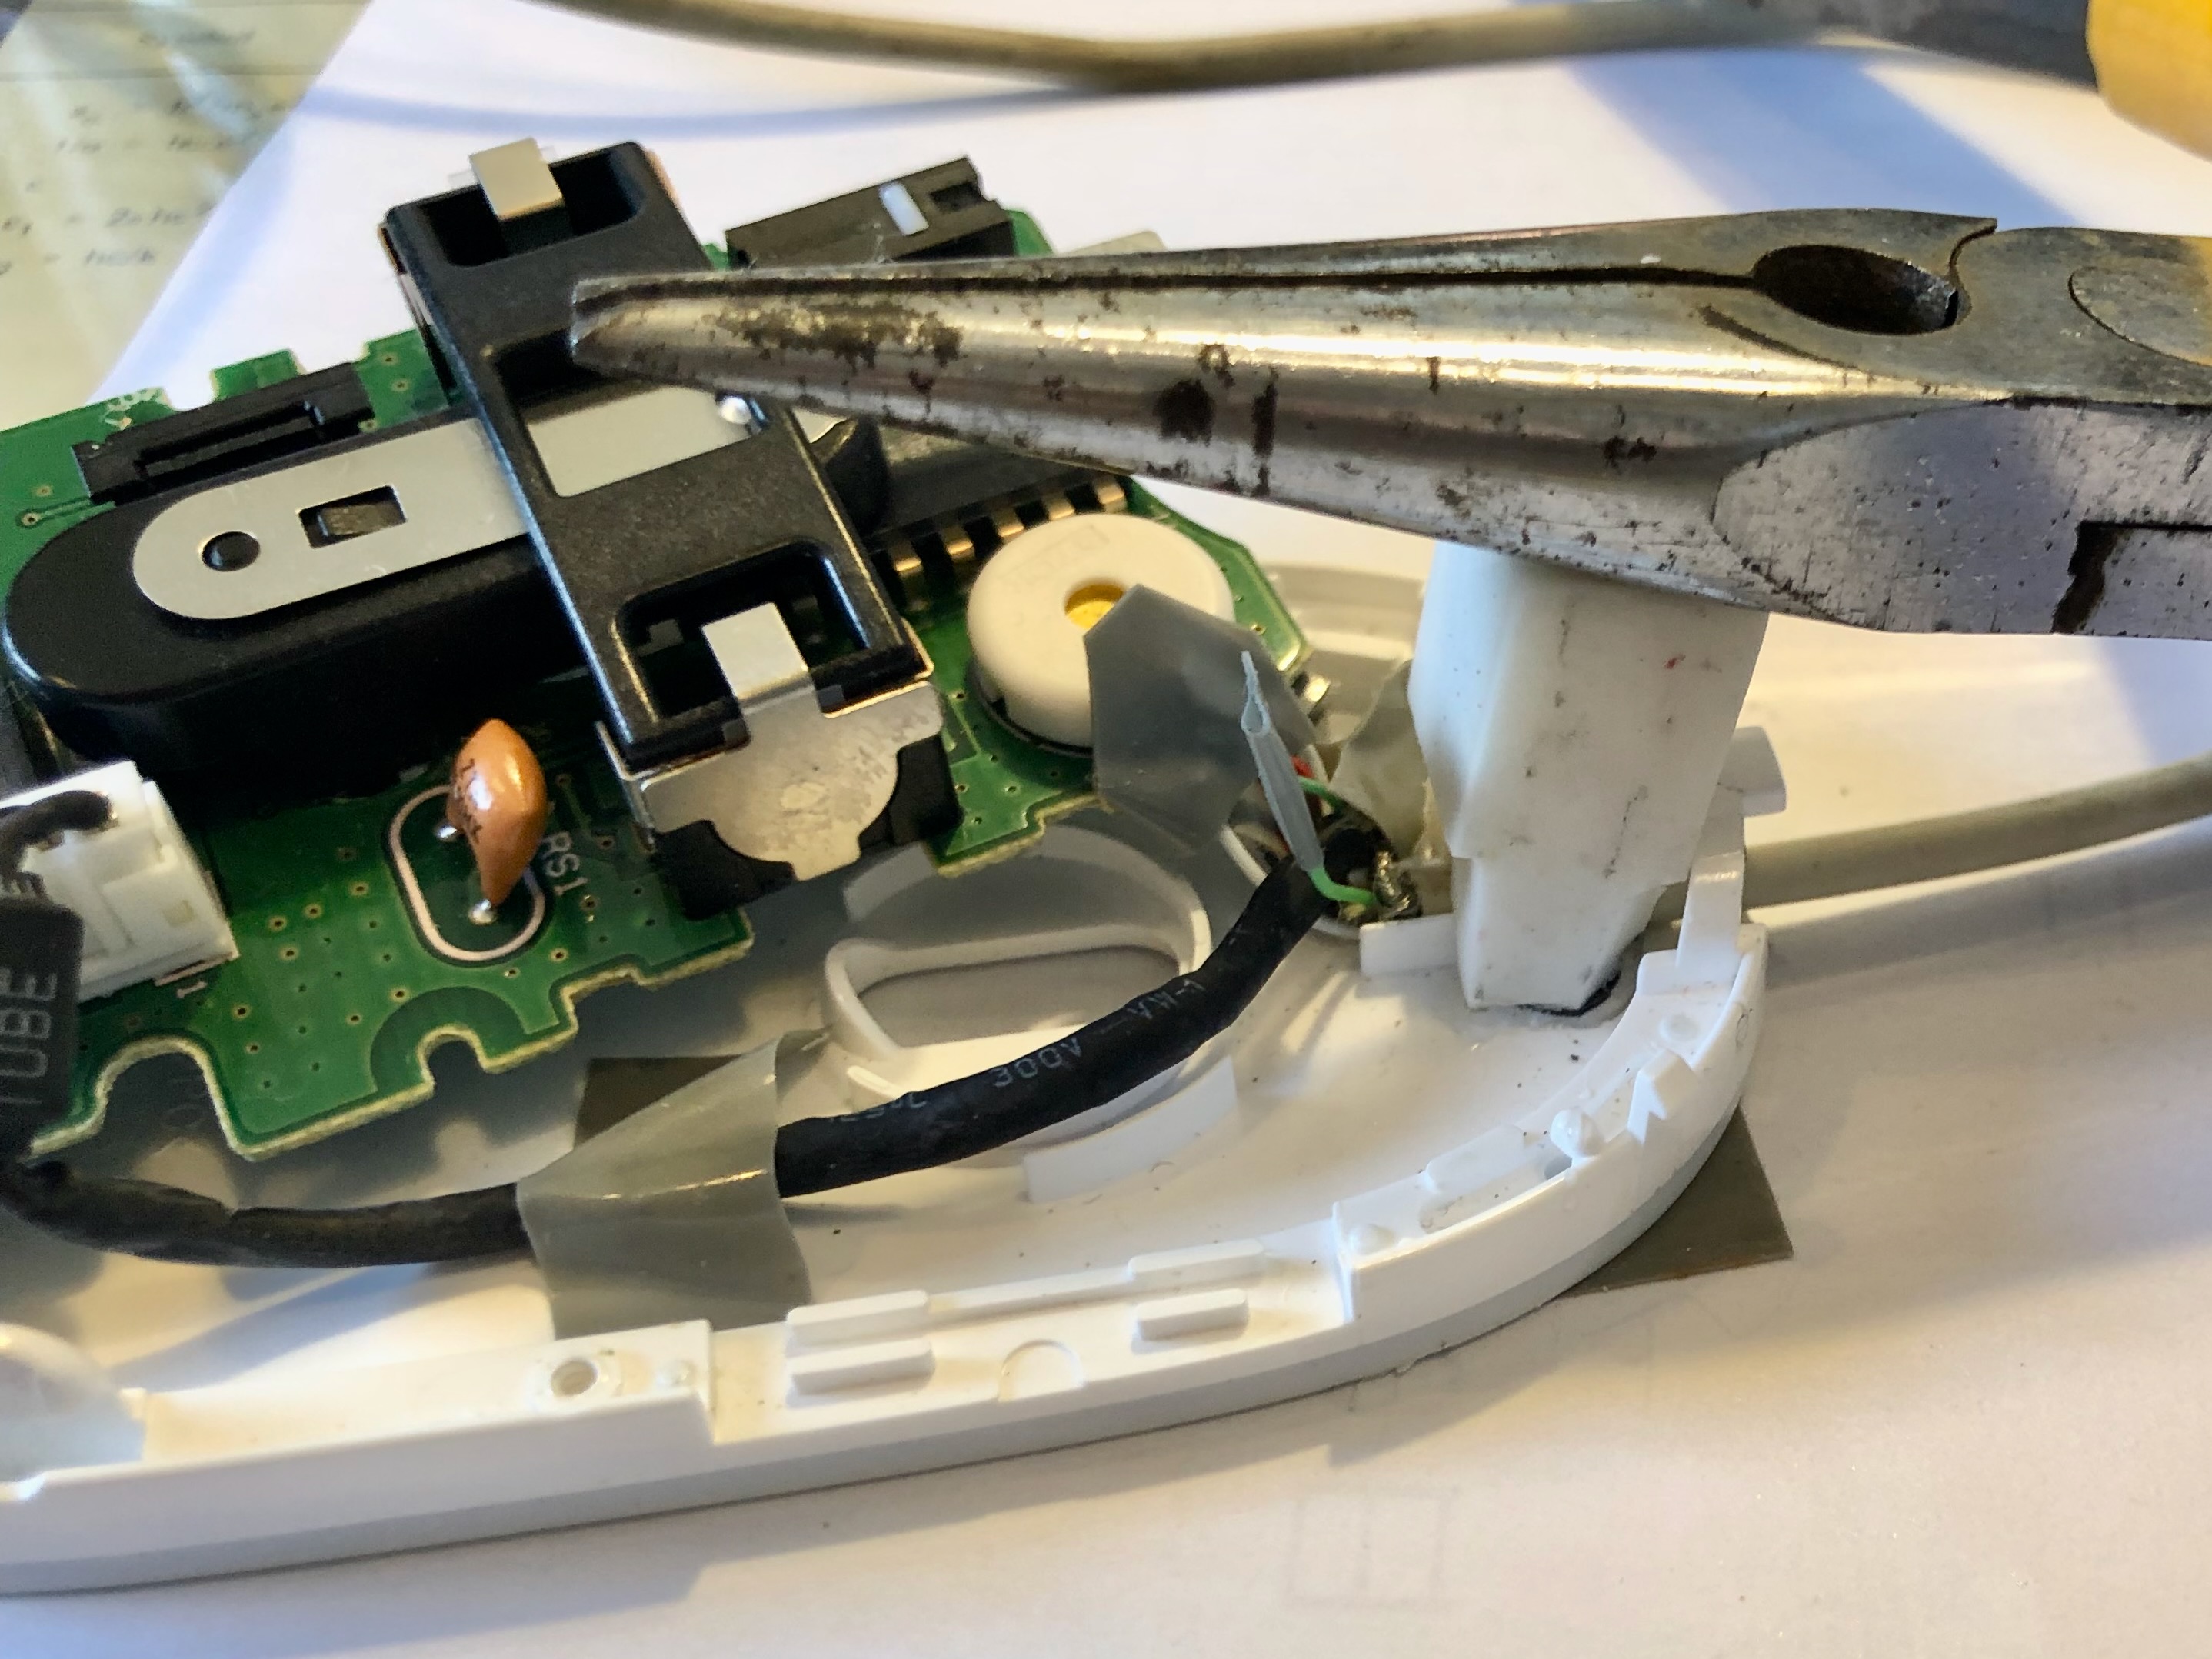
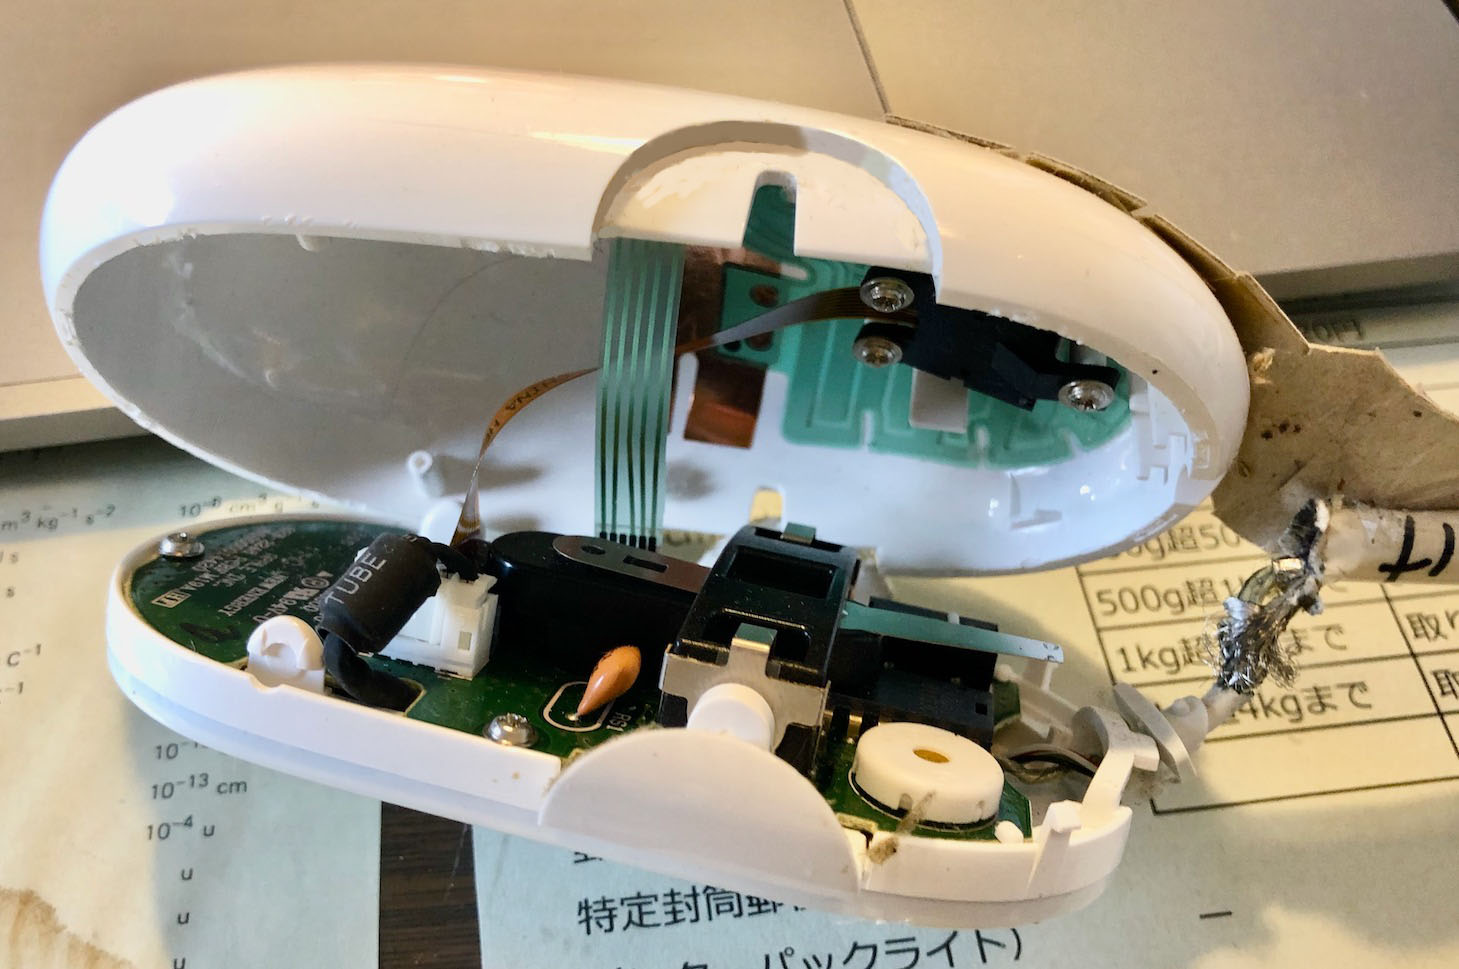 2本のリボン状電線をそれぞれコネクタから抜き取る。/ Pull each of the two ribbon wires out of the connector.
新しいケーブルと内部のケーブルをハンダ付けで接続。それぞれを絶縁テープでカバー。細かい作業に難儀します。/ Connect the new cable to the internal cable by soldering. Cover each with insulation tape. It is a difficult detailed work.
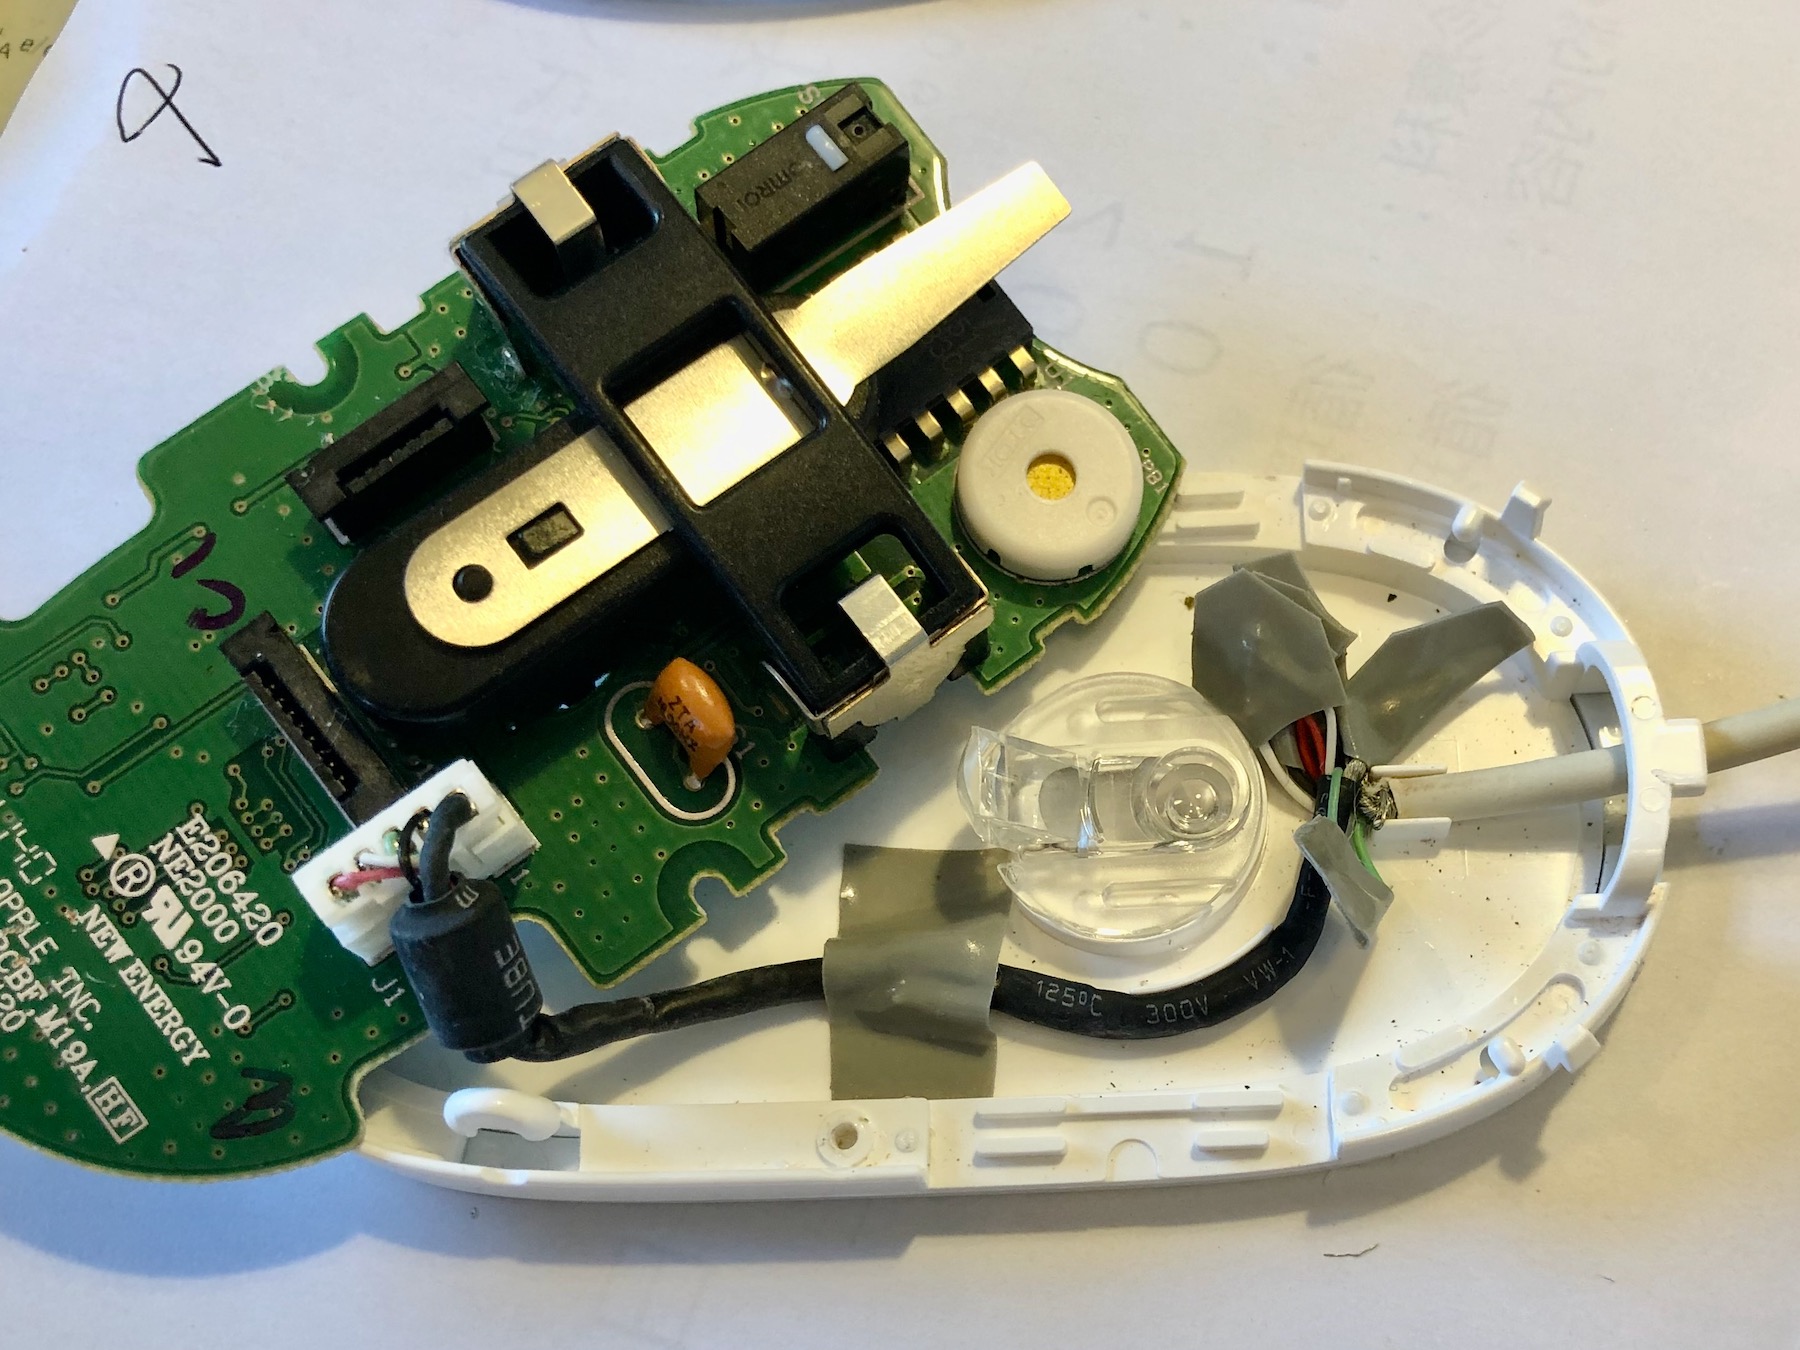
ケーブルを入り口すぐで"Ω"状の小さな金属(コードステッカーの爪の部分を加工)で押さえ、ケーブルごと基盤のプラスチックに接着剤で止める。消しゴムを切ってクッションにして上から重しをかけてしばらく放置。/ Hold the cable just inside the entrance with a small metal "omega" shaped piece (the nail part of the cord sticker is machined) and glue the entire cable to the plastic of the base. Use the cut eraser as a cushion, place a weight on top, and let it sit for a while.
接着完了。/ Adhesion is complete.
天蓋部分とはめ合わせ、リングを接着剤で付ける。/ Fit it with the canopy part and glue the ring.
接着剤が固まるまでビニールテープで締め付けておく。/ Tighten with vinyl tape until the adhesive hardens.
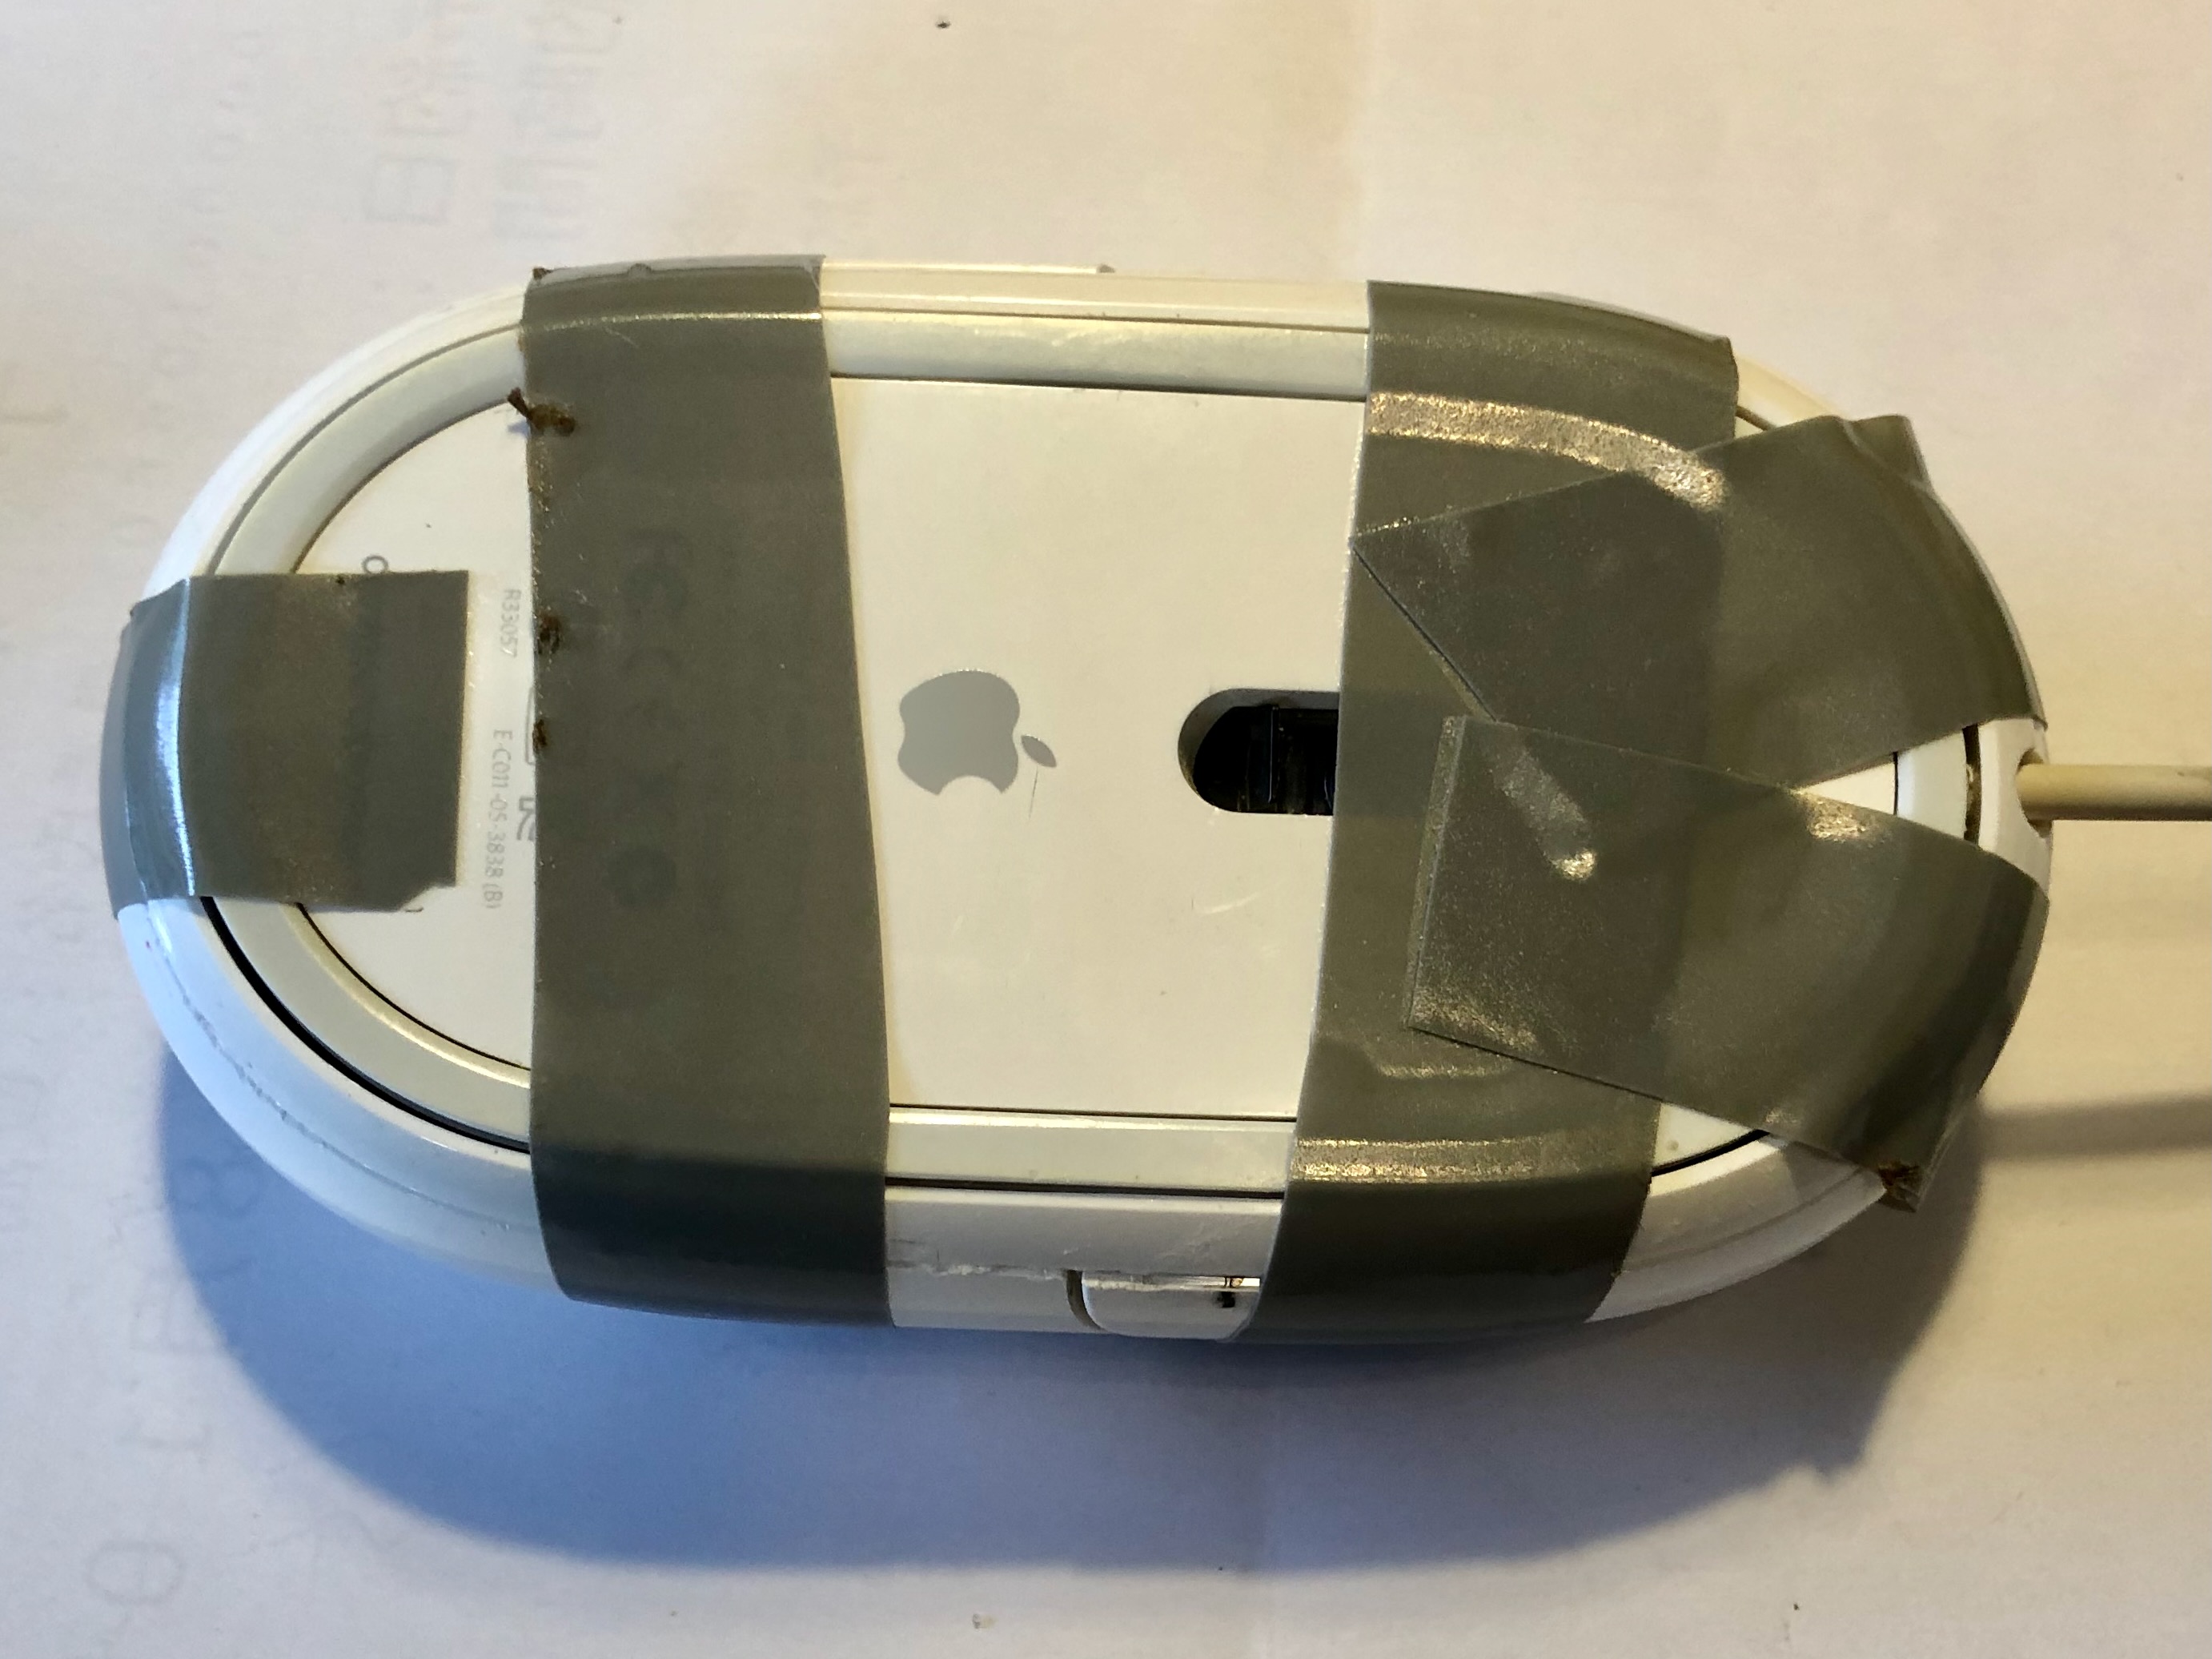
完成。/ Finish.
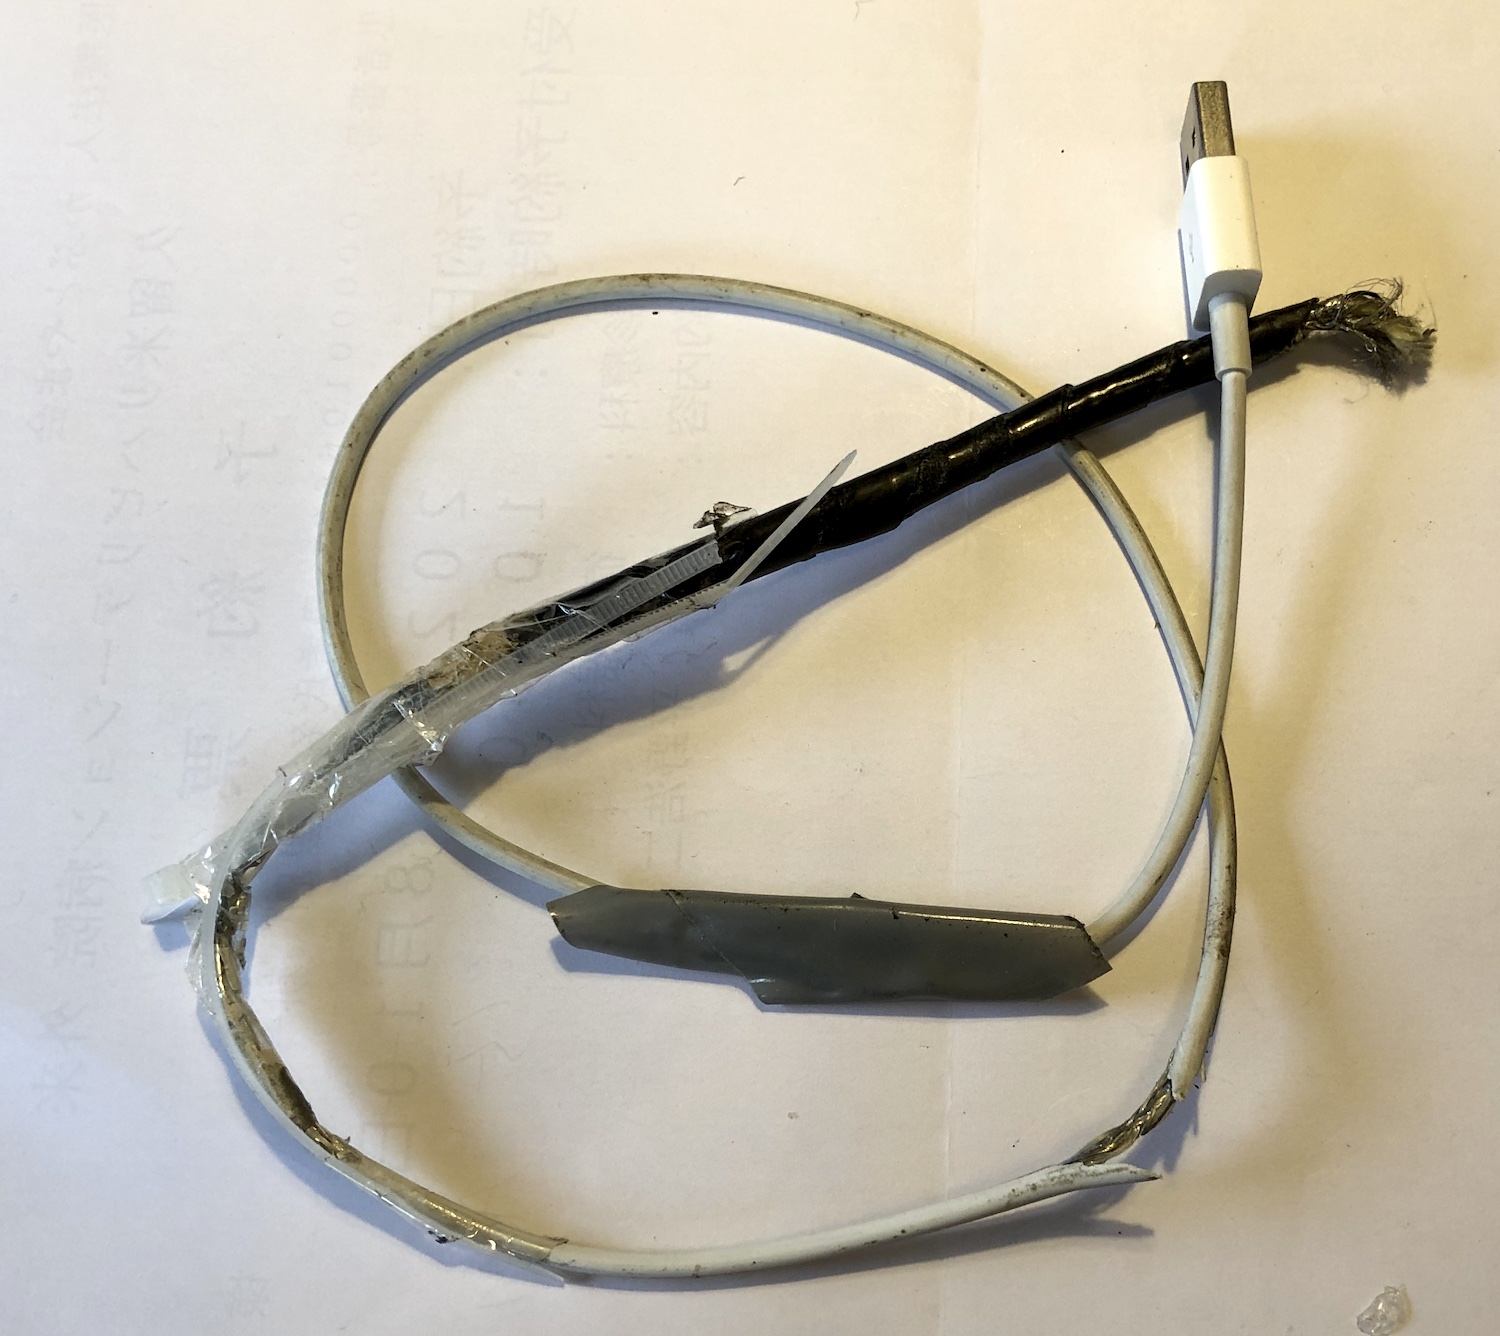
もとの、ボロボロのケーブルは廃棄。/ The original, battered cables will be discarded.
http://inufuna.way-nifty.com/rouhi/2007/05/post_ea13.html
無線マウスは便利ですが、電池切れ(充電)の心配が面倒です。それで有線タイプは捨て難い。参考になる人が日本中に1人でもいるどうかわかりませんが・・・。
下側の細いリングをこじ開けて剥がす。接着剤でつけてあるので、割らないように。ここが一番の難所。/ Pry open the thin ring on the bottom side and peel it off. It is attached with adhesive, so be careful not to break it. This is the most difficult part.
リングを外すと上下に割れます。爪を壊さないように。(2日朝、上の窪みが汚いので画像を「掃除」しました。)/ When the ring is removed, it splits up and down. Do not break the nails.
2本のリボン状電線をそれぞれコネクタから抜き取る。/ Pull each of the two ribbon wires out of the connector.新しいケーブルと内部のケーブルをハンダ付けで接続。それぞれを絶縁テープでカバー。細かい作業に難儀します。/ Connect the new cable to the internal cable by soldering. Cover each with insulation tape. It is a difficult detailed work.
ケーブルを入り口すぐで"Ω"状の小さな金属(コードステッカーの爪の部分を加工)で押さえ、ケーブルごと基盤のプラスチックに接着剤で止める。消しゴムを切ってクッションにして上から重しをかけてしばらく放置。/ Hold the cable just inside the entrance with a small metal "omega" shaped piece (the nail part of the cord sticker is machined) and glue the entire cable to the plastic of the base. Use the cut eraser as a cushion, place a weight on top, and let it sit for a while.
接着完了。/ Adhesion is complete.
天蓋部分とはめ合わせ、リングを接着剤で付ける。/ Fit it with the canopy part and glue the ring.
接着剤が固まるまでビニールテープで締め付けておく。/ Tighten with vinyl tape until the adhesive hardens.
完成。/ Finish.
もとの、ボロボロのケーブルは廃棄。/ The original, battered cables will be discarded.
2022-09-01 23:42
nice!(0)
コメント(0)
Facebook コメント
yamamoto さん
2004年12月25日開設
 アンジー・ゼルター著「非暴力直接行動が世界を変える
核廃絶から気候危機まで、 一女性の軌跡」発売中
アンジー・ゼルター著「非暴力直接行動が世界を変える
核廃絶から気候危機まで、 一女性の軌跡」発売中
チラシ・本の内容
東京での出版記念会の録画など(24/2/13)
---------------
新型コロナ等患者数推計値(モデルナ社) 下水サーベイランス 小松市, 札幌市, 仙台市, 宇部市, 養父市, 神奈川県, 山梨県
死亡数(厚労省サイト)
福岡県の感染数(新型コロナ項目をクリック)
コロナ感染・世界の状況


小西誠氏作成「メディアが報じない、先島―南西諸島の自衛隊配備の実態」
「米国の科学と軍産学複合体―米ソ冷戦下のMITとスタンフォード」
翻訳出版 2021年1月
佐賀市への自衛隊配備反対
-佐賀空港へのオスプレイ配備問題-
オスプレイ反対住民の会・最新情報ページ/オスプレイ裁判支援市民の会/オスプレイストップ!9条実施アクション佐賀・同規約,「非暴力と安全の誓約書」
西日本「自衛隊共用否定の原点は軍事基地反対」/佐賀大学 退職・現職教員 有志声明
ペガサスホームページ終了につき,リンク切れの時はURL冒頭部分の置き換えをお願いします.
新URL ↓↓↓↓↓
http://ad9.org/pegasus/
■原子力資料情報室
■オキュパイ普天間
デモの後はNHKへ!ニュースのスタジオへ!
佐賀大学退職金裁判
 アンジー・ゼルター著「非暴力直接行動が世界を変える
核廃絶から気候危機まで、 一女性の軌跡」発売中
アンジー・ゼルター著「非暴力直接行動が世界を変える
核廃絶から気候危機まで、 一女性の軌跡」発売中チラシ・本の内容
東京での出版記念会の録画など(24/2/13)
---------------
新型コロナ等患者数推計値(モデルナ社) 下水サーベイランス 小松市, 札幌市, 仙台市, 宇部市, 養父市, 神奈川県, 山梨県
死亡数(厚労省サイト)
福岡県の感染数(新型コロナ項目をクリック)
コロナ感染・世界の状況
小西誠氏作成「メディアが報じない、先島―南西諸島の自衛隊配備の実態」
「米国の科学と軍産学複合体―米ソ冷戦下のMITとスタンフォード」
翻訳出版 2021年1月
佐賀市への自衛隊配備反対
-佐賀空港へのオスプレイ配備問題-
オスプレイ反対住民の会・最新情報ページ/オスプレイ裁判支援市民の会/オスプレイストップ!9条実施アクション佐賀・同規約,「非暴力と安全の誓約書」
西日本「自衛隊共用否定の原点は軍事基地反対」/佐賀大学 退職・現職教員 有志声明
ペガサスホームページ終了につき,リンク切れの時はURL冒頭部分の置き換えをお願いします.
新URL ↓↓↓↓↓
http://ad9.org/pegasus/
■原子力資料情報室
■オキュパイ普天間
デモの後はNHKへ!ニュースのスタジオへ!
佐賀大学退職金裁判
よろしく
西鉄久留米駅前の19日街宣行動の動画
軍学共同反対連絡会
戦争をさせない1000人委員会
総がかり行動実行委員会


●やんばる東村 高江の現状(ヘリパッド阻止)
トラックバック が通らない場合はコメント欄に記事タイトルとURLをどうぞ.
ミラーサイト
記事総目次(08/8/18まで)

岩波書店「世界」1月号 「12名の日本市民はいかに英国の核基地を封鎖したか」→全文転載→東京報告会の録音,録画 核兵器をなくすきっかけがイギリスに! ファスレーン365
→ファスレーン365の本
軍学共同反対連絡会
戦争をさせない1000人委員会
総がかり行動実行委員会
●やんばる東村 高江の現状(ヘリパッド阻止)
トラックバック が通らない場合はコメント欄に記事タイトルとURLをどうぞ.
ミラーサイト
記事総目次(08/8/18まで)
岩波書店「世界」1月号 「12名の日本市民はいかに英国の核基地を封鎖したか」→全文転載→東京報告会の録音,録画 核兵器をなくすきっかけがイギリスに! ファスレーン365
→ファスレーン365の本
 9条守ろう! ブロガーズ・リンク
キャンペーン

はたして、911 は本当にテロだったのか。ZERO は、原版(イタリア語)の制作(2007年)以来、ローマ国際映画祭(2007年10月)、ブリュッセルEU議会場(2008年 2月)、ロシア国営放送(2008年9月)で上映された、対テロ戦争の原点を鋭くえぐる長編ドキュメンタリー。
サイト/ブログ
■ペガサス ホームページ
■イギリスの反核直接行動を支援![]()
(リンク更新)
■yamamotoのYouTubeチャンネル
■さよなら原発・佐賀連絡所
■タウン情報さがの原子力シリーズ記事
■Faslane365
■ピースデポ
■非戦を選ぶ演劇人の会
■福岡核問題研究会
■くるめ革新懇
■琉球弧ピースネット(FB)
■琉球弧の軍事基地化に反対するネットワーク(ブログ)
■今、自衛隊の在り方を問う!(小西誠氏のブログ
■NHKを監視・激励する視聴者コミュニティ
■ファスレーン365日本
■辺野古浜通信
■やんばる東村高江の現状
■SAVE JEJU 済州島 !
■きくちゆみのブログ
■核々しかじか(森九大名誉教授)
■低気温のエクスタシー,故宮
■全国国公私立大学の事件情報
■平和への結集
■マスコミに載らない海外記事
■カナダde日本語
■世に倦む日日


コメント 0